

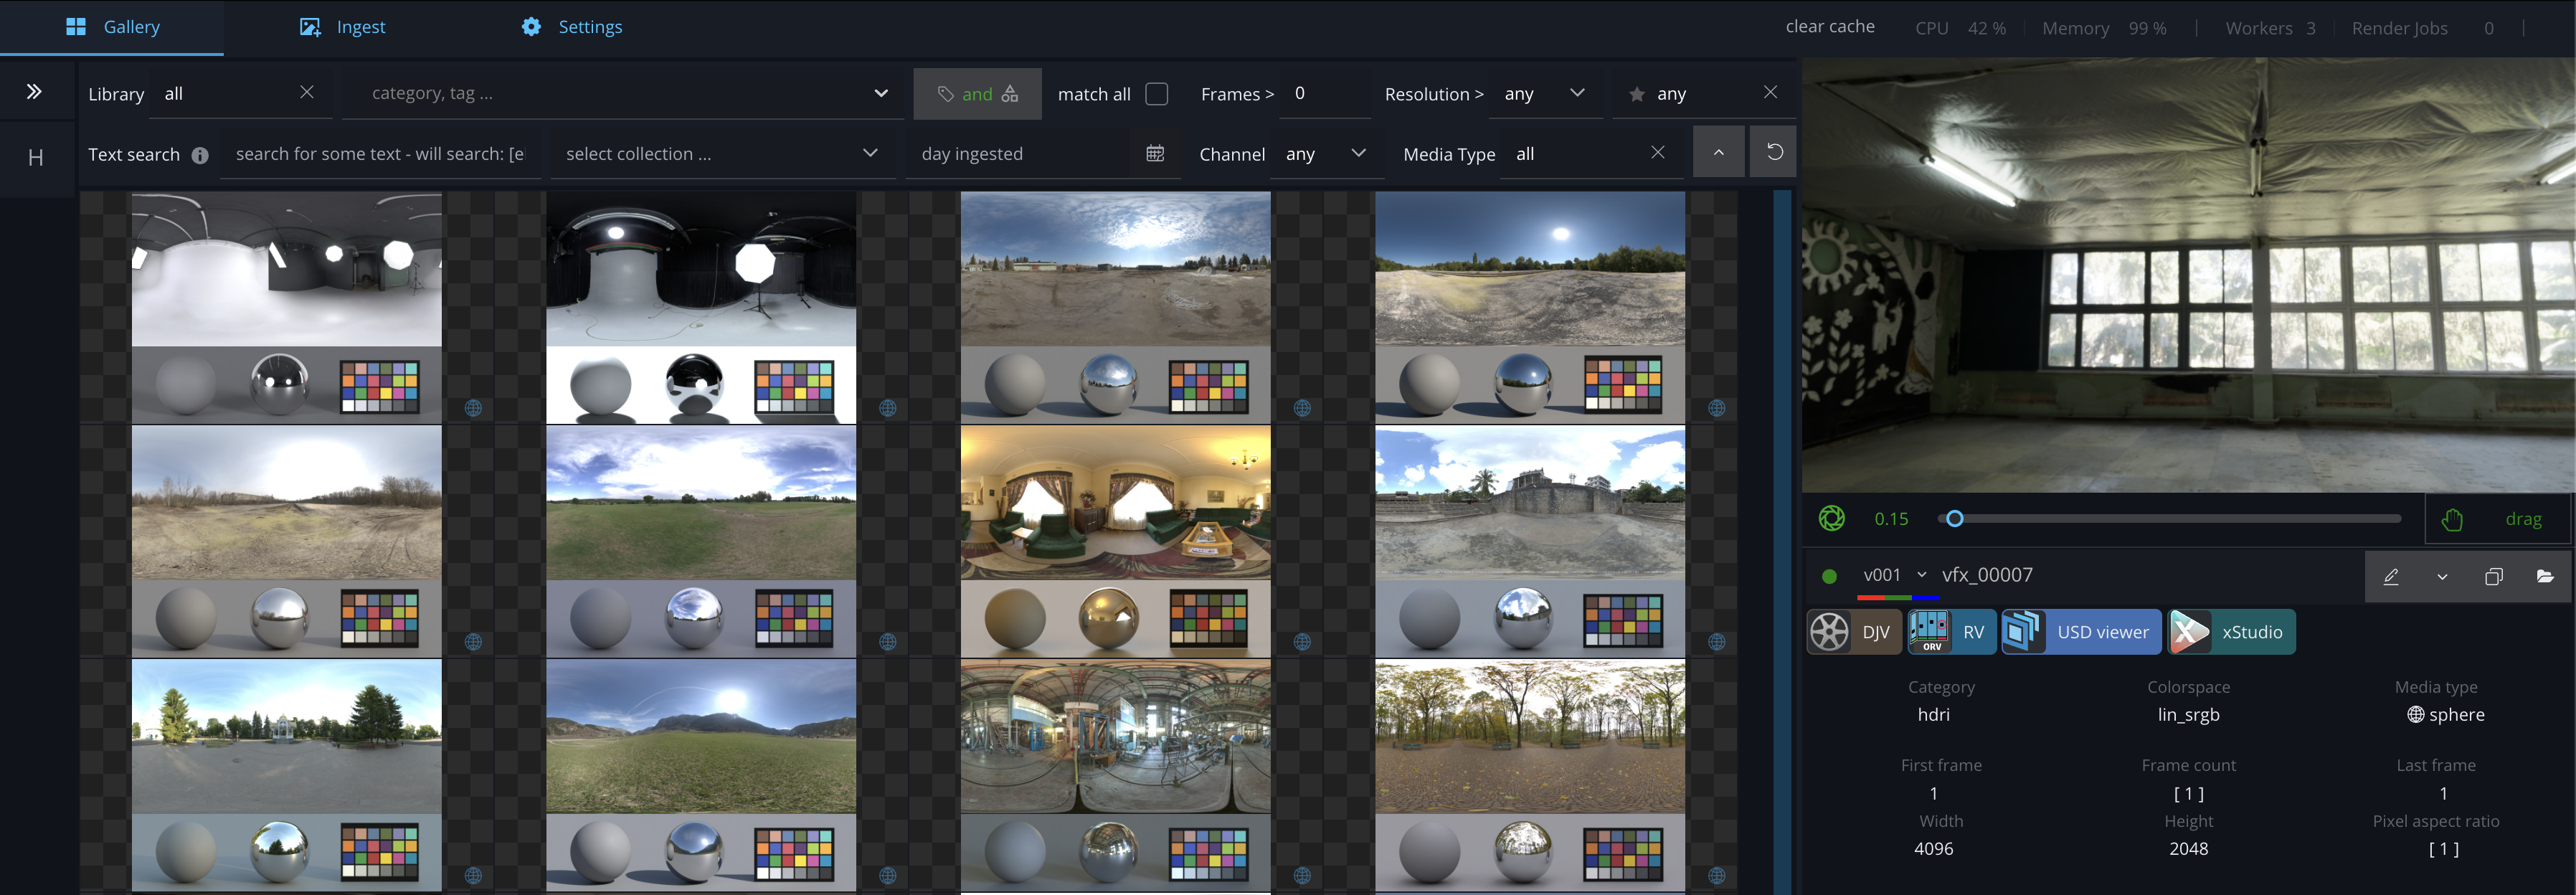
HDRI Preview is a free tool published on Nukepedia. It takes an equirectangular HDRI and renders a preview image that makes it easier to judge the lighting in an HDRI library at a glance.
The HDRI lights a studio scene with:
-
a grey sphere in 18% mid-grey
-
a chrome sphere
-
a color checkerboard in the X-Rite ColorChecker Classic reference colors
In the generated preview, the equirectangular HDRI sits in the top half of the image. The two spheres and the color chart sit below, on a grey background. The tool does not change the source HDRI.
In Das Element, you run the tool with a Custom Command transcoding task. The executable is python3, which calls hdri.py. The script then uses Blender to render the preview, so Blender 4.5 LTS or newer still needs to be installed. You do not set Blender as the exec value.
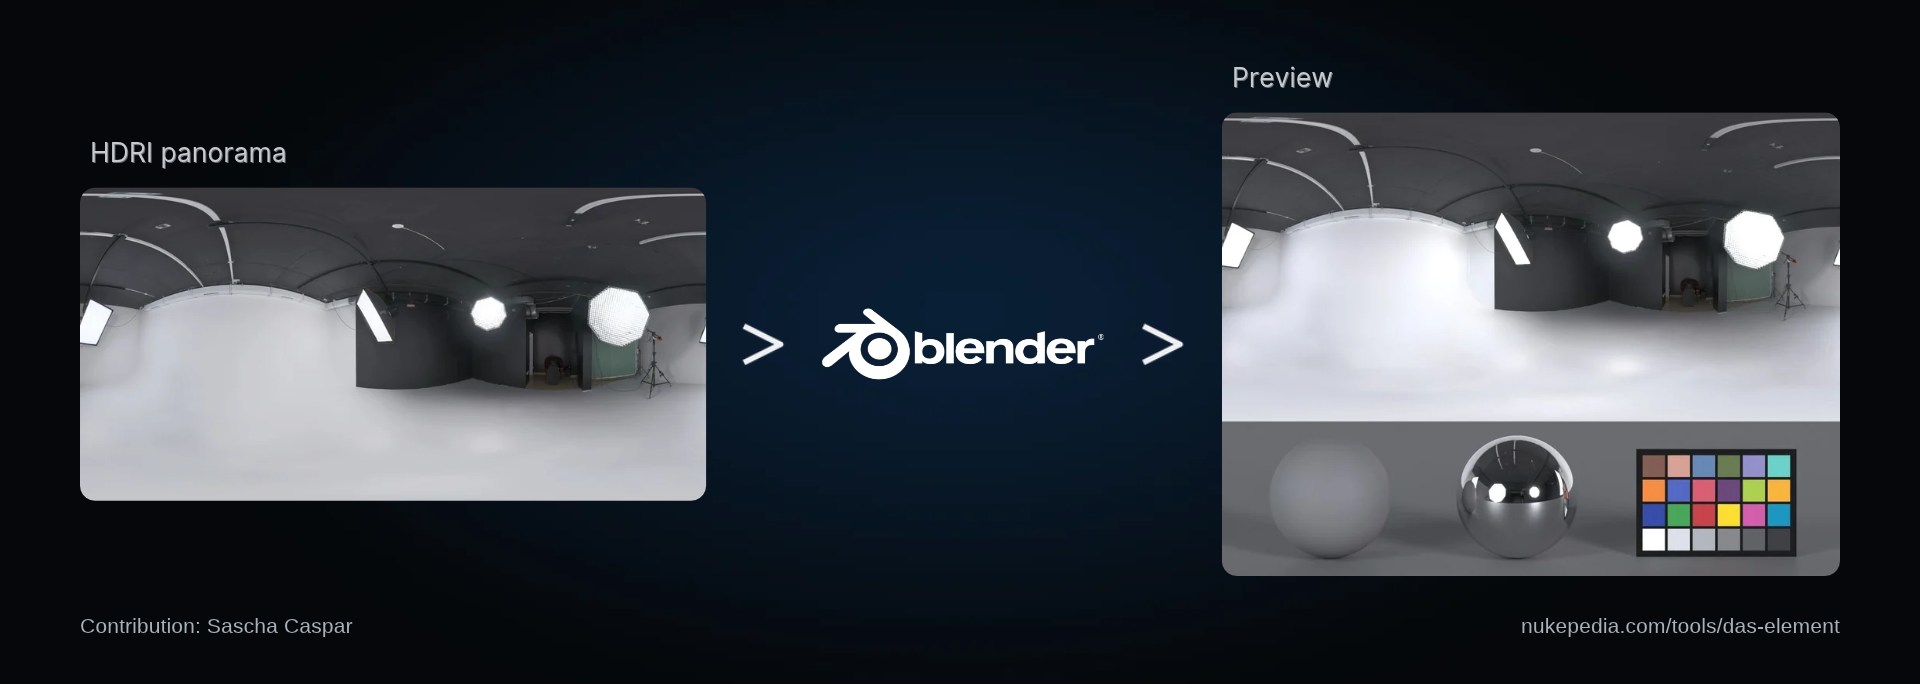
Input
an equirectangular 360 HDRI of a white cyclorama photo studio with a dark ceiling, octagonal softboxes and strip lights.
Output
a preview image with that panorama in the top half and a matte grey sphere, a mirror chrome sphere reflecting the lights, and a 24-patch X-Rite ColorChecker Classic on a grey background in the bottom half.
Examples
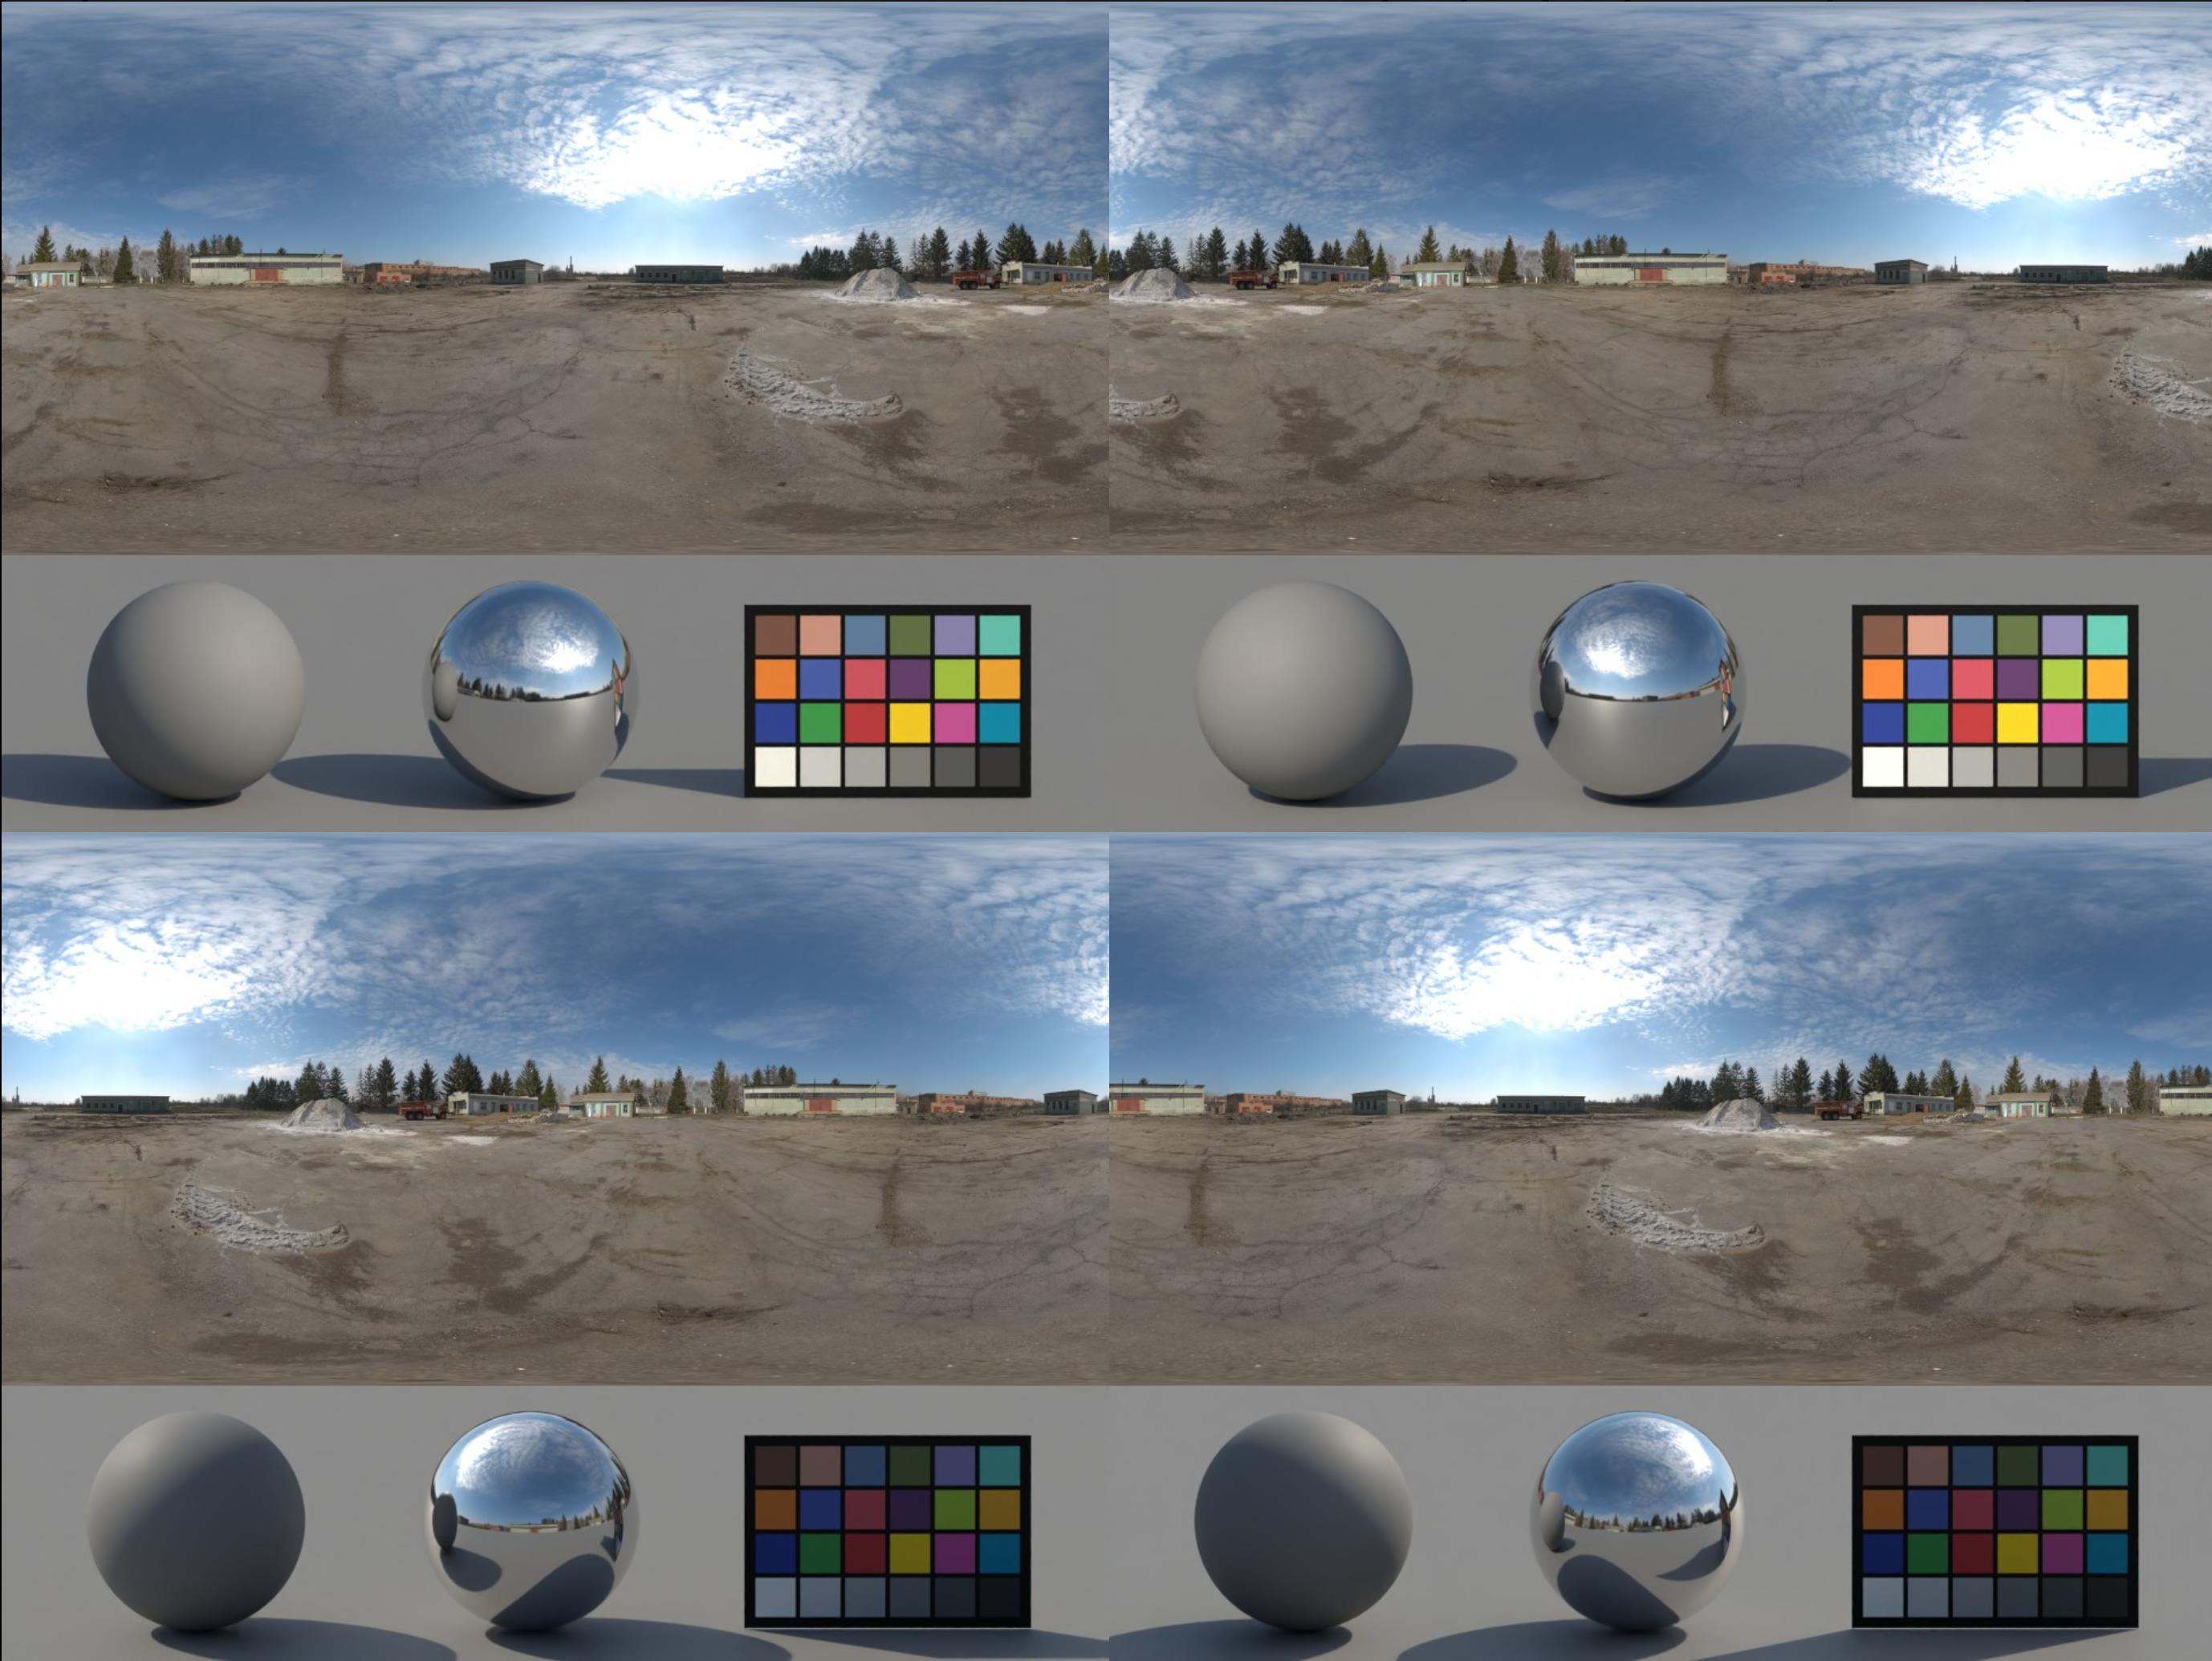
Here are four example preview outputs. Each one shows the equirectangular HDRI on top, with the grey sphere, chrome sphere and color chart below with different rotations of the HDRI image.
Requirements
-
Blender 4.5 LTS or newer.
hdri.pylaunches Blender to render the studio scene. If Blender is not in the default location, edit the matchingBLENDERassignment in theUSER CONFIGURATIONblock near the top ofhdri.py. -
Python 3, with no extra packages. In Das Element, the Custom Command uses
python3.
|
System |
Default Blender path in |
|---|---|
|
Windows |
|
|
macOS |
|
|
Linux |
|
Set up in Das Element
1. Download the tool
Download files from the HDRI Preview page on Nukepedia. Unpack the package into any folder. Keep these files together:
-
hdri.py -
render.py -
hdri.blend
2. Create the transcoding template
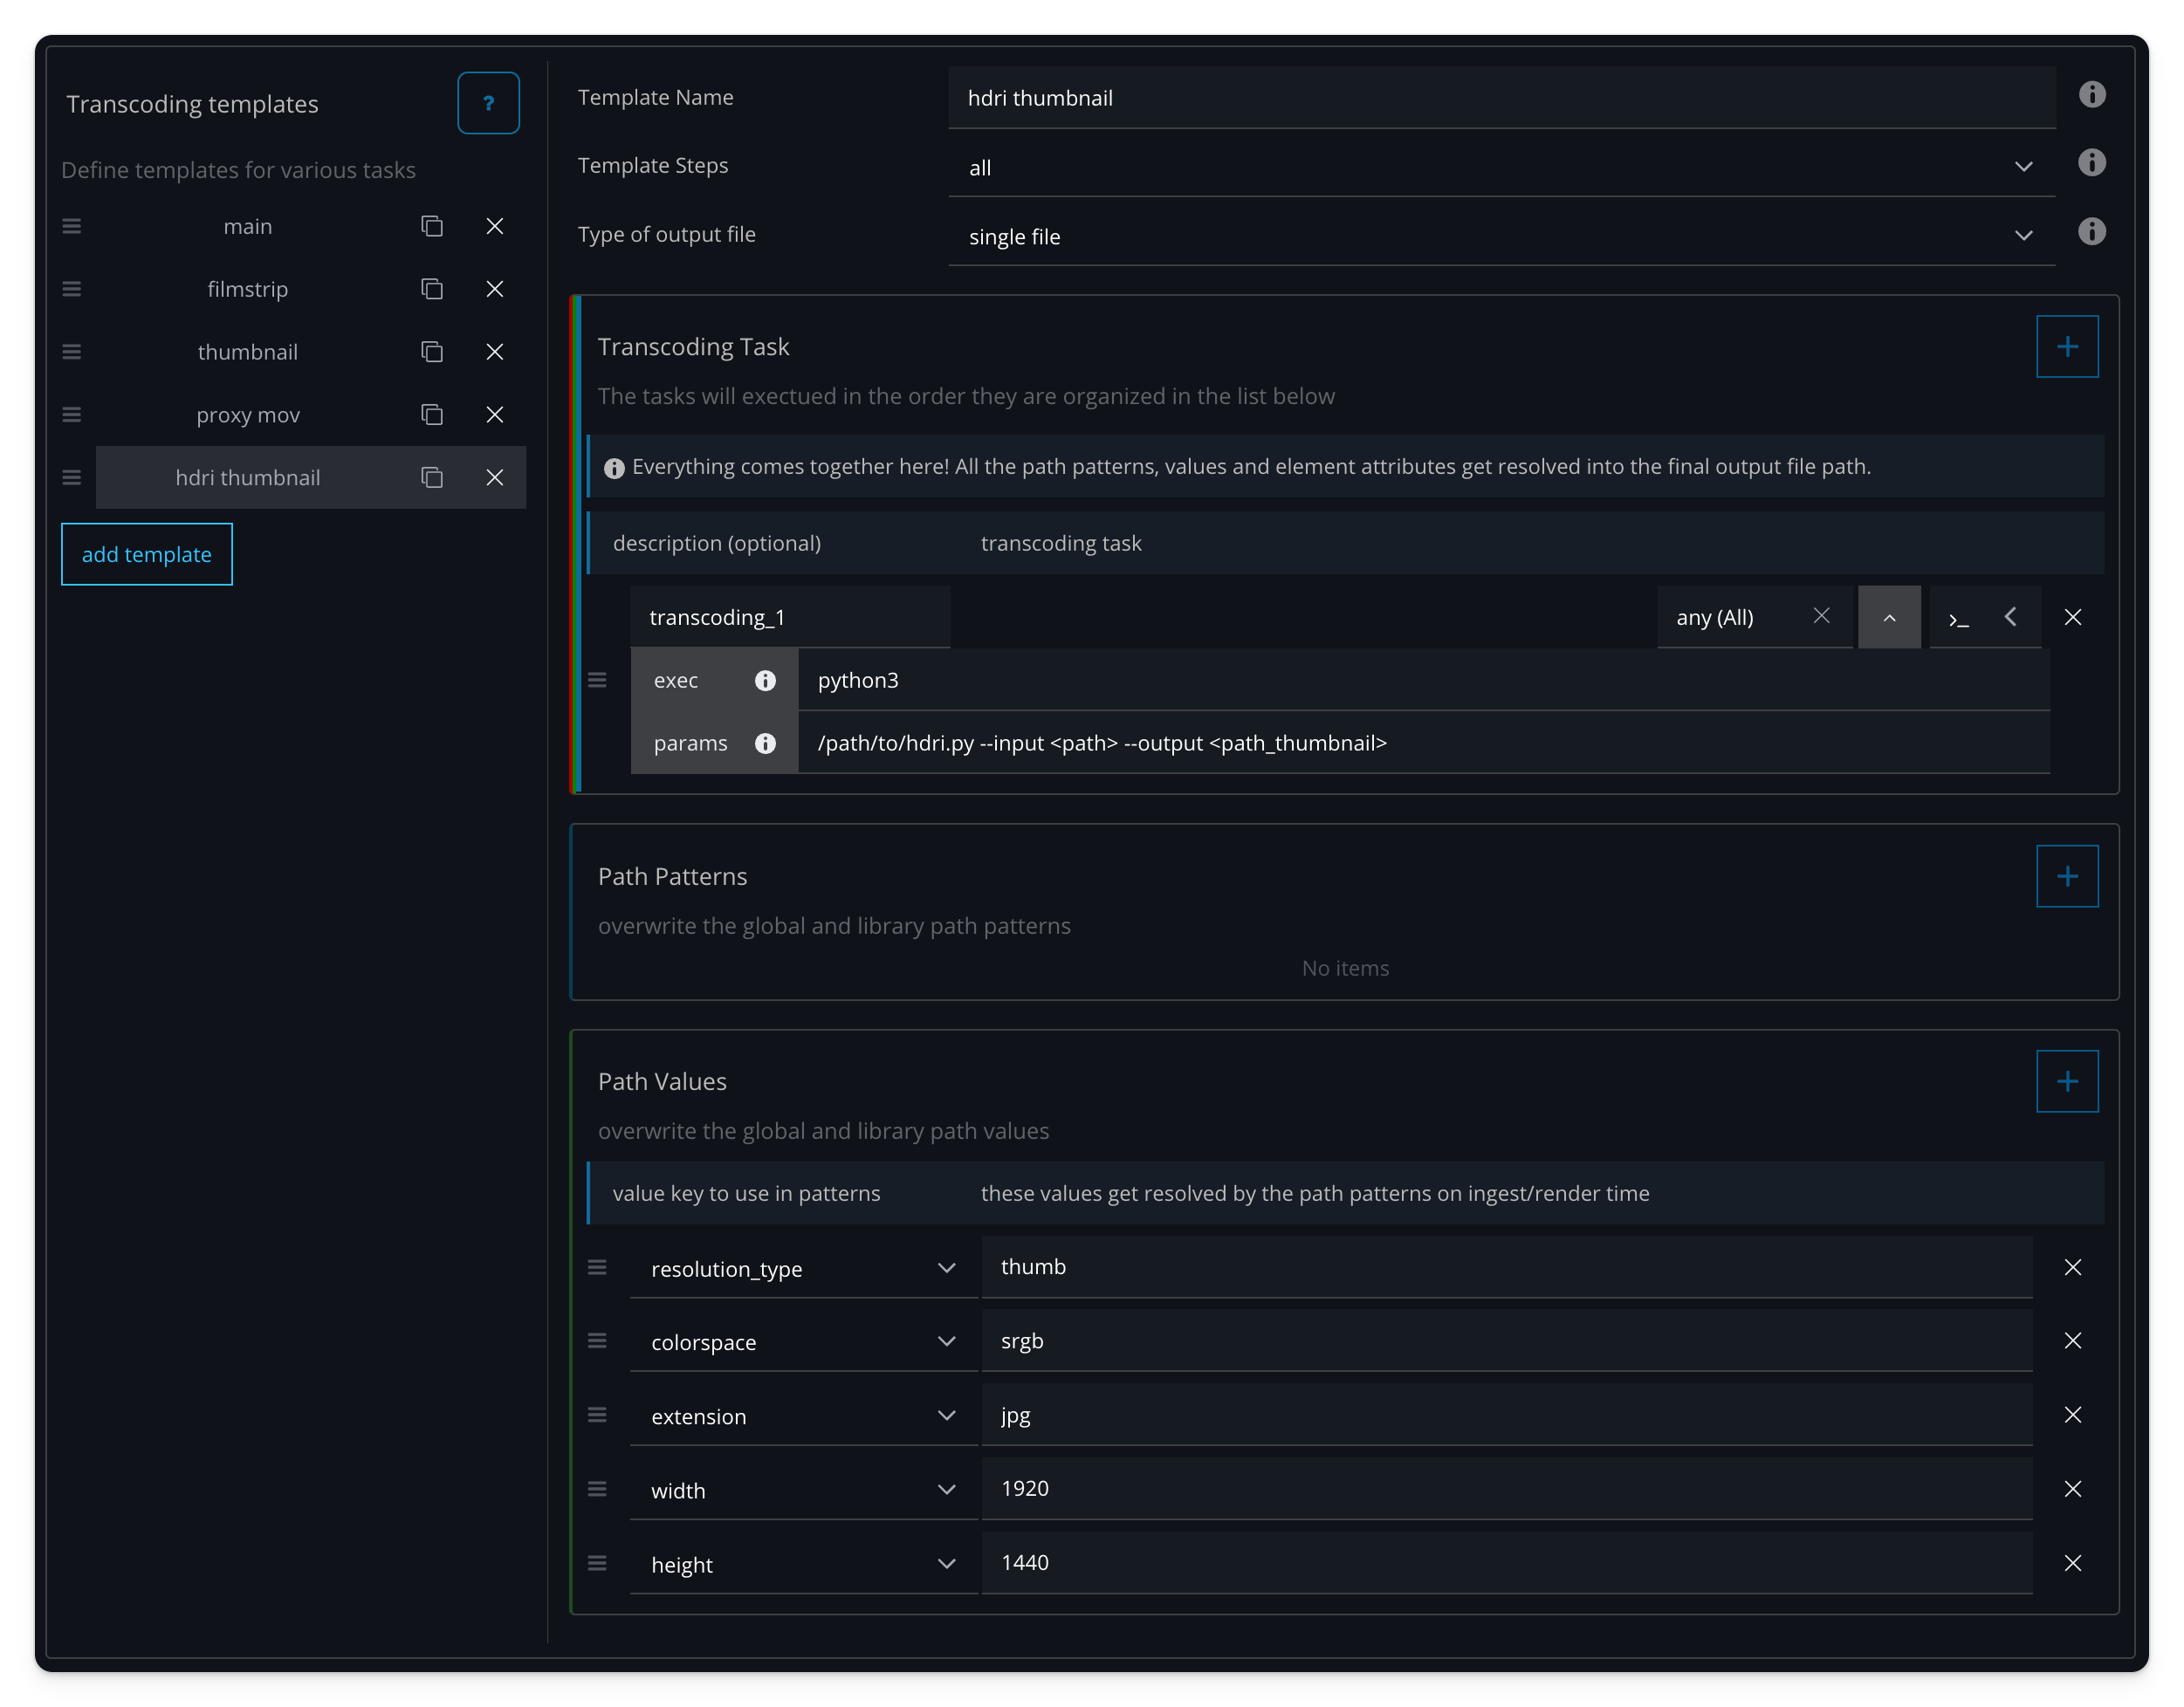
In Settings > Transcoding templates, create a new template named hdri thumbnail. Set Template Steps to all and Type of output file to single file.
3. Add the Custom Command task
Add a transcoding task and set the type to Custom Command.
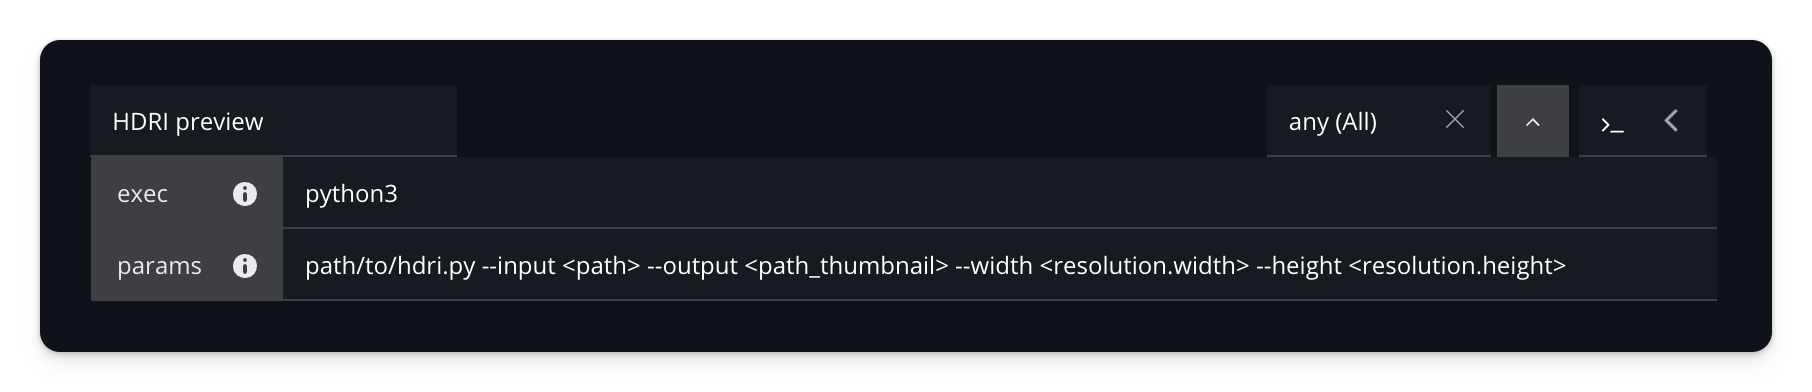
Set exec to:
python3
Set params to:
/path/to/hdri.py --input <path> --output <path_thumbnail>
Replace /path/to/hdri.py with the actual path to the script on your system
4. Set the Path Values
In the same template, set these Path Values to control the output file path:
|
Value key |
Value |
|---|---|
|
|
|
|
|
|
|
|
|
|
|
|
|
|
|
The width and height values set the thumbnail resolution to 1920 by 1440. The thumbnail template type is documented as JPEG output, so this template uses jpg. The tool itself can also write .webp or .png.
5. Assign the template in Template Mapping
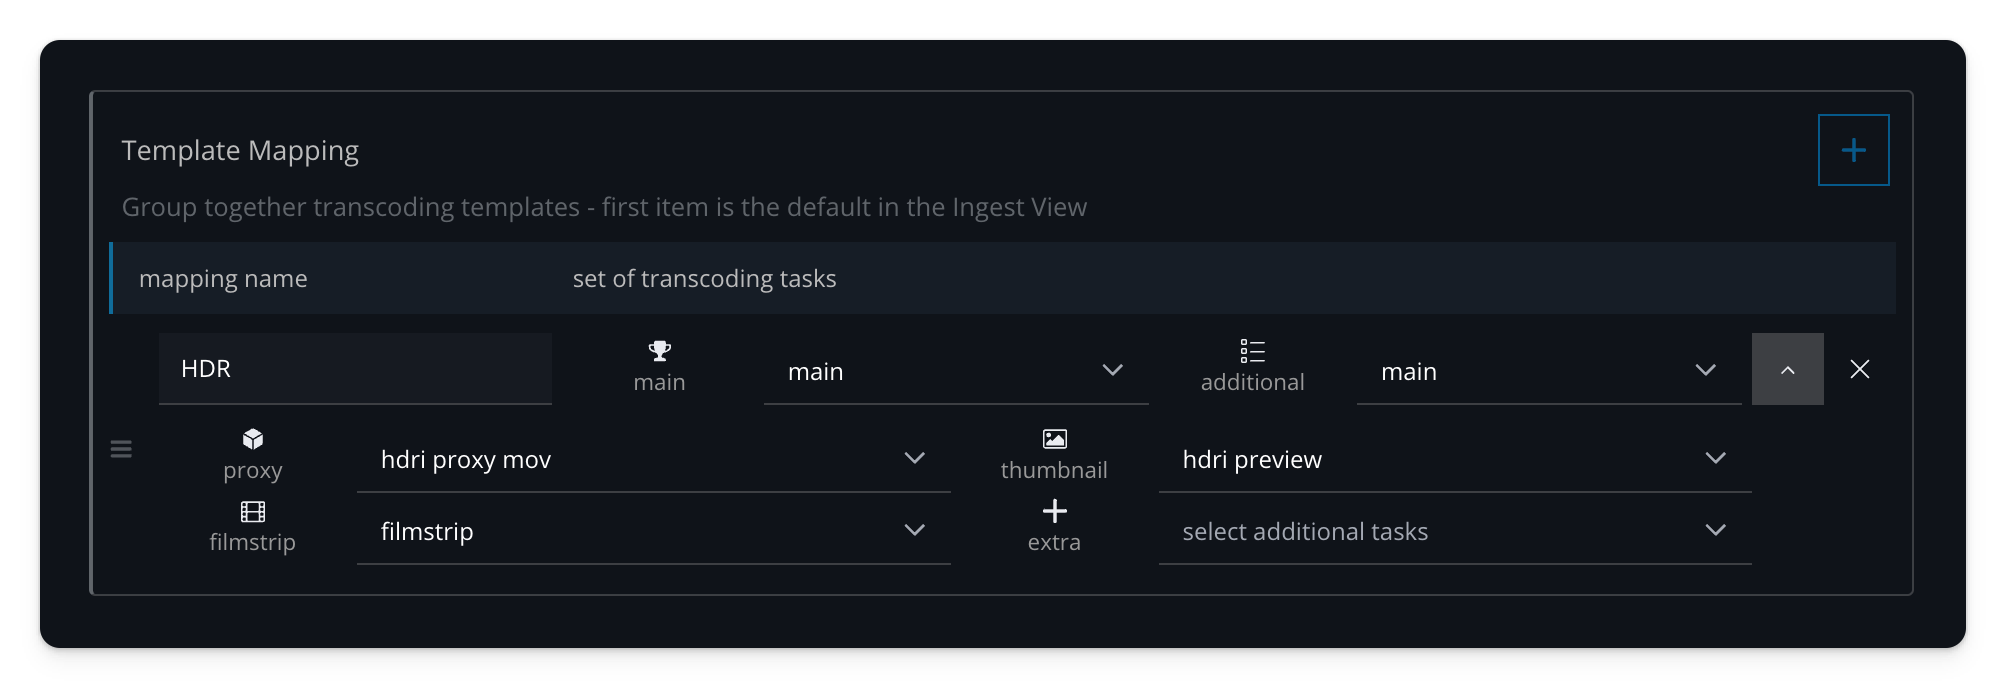
In Settings > Template Mapping, open the mapping you use for these HDRIs, for example HDR. Set the thumbnail slot to hdri thumbnail.
6. Ingest the HDRIs
Ingest your HDRIs with that template mapping. Das Element runs the transcoding templates, including the Custom Command that calls HDRI Preview.
For a 360° HDR that is an .exr file, the default media type is image. In the Ingest View, set the media type to sphere so the gallery can use the HDR viewer. This is separate from generating the preview image. See Ingest.
7. Check the result in the Gallery
Check the result in the Gallery. The generated previews appear as the element thumbnails. Open an element to confirm the preview in the detail panel on the right.
Existing elements
The same template mapping is also available in the Gallery View (edit mode, then re-render).
-
Go to the Gallery View and select the element.
-
In Element Details, switch to edit mode.
-
Select the transcoding mapping.
-
Run the re-render task.
To re-render only the thumbnail, set every other template in the mapping to a NoOp task and leave the thumbnail template as hdri thumbnail. See the "Example only re-render thumbnail" section on Transcoding.
Use the tool on the command line
You can also run the tool outside Das Element:
python3 /path/to/hdri.py --input <path> --output <path_thumbnail>
With options:
python3 /path/to/hdri.py --input <path> --output <path_thumbnail> --rotation 90
Set the Blender path at the top of hdri.py first, as described above. Paths are relative to the folder you call the command from.
|
Option |
Meaning |
|---|---|
|
|
Required |
|
|
Required |
|
|
Preview width (Default: 1920) |
|
|
Preview height (Default: 1440) |
|
|
Rotate the panorama and lighting (default: 0) |
Customize the scene
The main scene is hdri.blend. You can open it in Blender and change objects, materials, the camera, the render engine or color management. Save the file, and the next render uses it.
Keep these two items, with their names:
-
The image
render_preview_hdriin the Environment Texture node of the world. To see the world's nodes, open the Shading workspace and switch the Shader Editor from Object to World. The image has no file, so the world stays black until a render puts your HDRI into it. -
The scene property
render_preview_rotationunder Properties editor, Scene tab, Custom Properties. It controls panorama and lighting rotation in radians when--rotationis omitted.
Samples and image quality come from the scene's render and output settings. The render size there sets the default image size and its shape.
Notes
-
You can also set a custom thumbnail by dragging a file onto the preview, or with a pre-ingest hook. See Set a custom thumbnail.